Have you ever dreamed of picking fresh, sweet figs from your backyard tree? Whether you’re a backyard grower or a container gardener, learning how to propagate fig tree from cuttings is one of the easiest ways to grow your own organic fruit.
The best part? You don’t need to buy an expensive nursery plant. With just one healthy branch and a bit of patience, you can grow your fig tree from scratch.
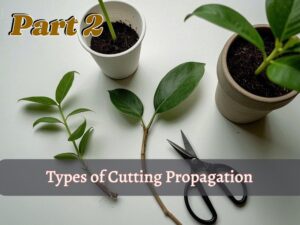
Propagation Methods for Fig Tree
By the way, cuttings propagation is not the only way to grow a fig tree. There are other propagation methods too, like grafting, layering, and even growing from seeds.
But as mentioned by the University of California and FigBoss, growing from seeds is rare and does not always give you the same fruit quality as the parent tree.
Grafting and layering also work, but for generations, the easiest and most reliable method has been growing figs from cuttings.
You know what, if you want to buy a fig tree from a nursery to transplant into your home garden, then the fall season is a good time, discover when to transplant trees. Also, explore more helpful guides about this topic.
Can you plant trees in the fall? What’s the possibilities?
Can you take a fig cutting in the fall? See the complete guide.
Material List for Fig Cutting Propagation
| Material | Use / Purpose |
|---|---|
| Sharp bypass pruner | For clean and safe cutting |
| Healthy fig cutting (6–8 in.) | Main propagation material |
| Rooting hormone | Speeds up root growth (optional) |
| Seedling cups / small pots | For rooting the cuttings |
| Mulch (thin layer) | Improves drainage (optional) |
| Potting mix | Supports healthy rooting |
| Spray bottle (water) | Keeps soil moist |
| Humidity dome / plastic cover | Maintains moisture (optional) |
| Raised bed / larger pot | For transplanting later |
| Labels or tags | To track cuttings (optional) |
How to Propagate Fig Tree From Cuttings?
Before moving on to the steps, you must know when to take fig cuttings because planting is all about timing. That’s why I always give first priority to “when to plant” Anyway, when taking fig hardwood cutting, make sure there is late winter or early spring in your area.
- How to Get Rid Of Gnats in Plants: 10 Natural Ways

- How Far Apart to Plant Peach Trees in an Orchard or Backyard

- How to Transplant Trees Safely: 5 Must-Follow Steps

The main purpose is always to take a cutting when the fig tree has fallen its leaves in a dormant condition. Because fig is a deciduous tree it means they lose their leaves in the fall. Planting time of fig tree varies based on diversity across the region, so just ensure to take bypass pruners 4 to 6 weeks before the last expected frost date.
Here know what factors decide best cutting time for fig tree in YOUR area!
Now, let’s move to how to propagate fig tree from cuttings to create your own fig paradise.
Step 1: Choose Healthy Cuttings and Cut
Take a moment and look closely at your 2 to 3-year-old fig tree and search for a branch section where you can clearly spot 3 to 4 visible buds, or even slightly fewer, depending on the health and position.
Once you’ve found that perfect spot, measure a section about 8 to 12 inches (20–30 cm) long. According to basic gardening know-how, the branch should be about (1.3–1.9 cm) thick, roughly the size of your finger, or a bit thicker than a pencil.
Now, take your sharp pruning shears, preferably bypass pruners, for a clean cut and cut just above a node at the top (flat cut) and below a node at the bottom (angled cut).
Step 2: Prepare The Cuttings for Rooting
Since your cutting is taken from a dormant fig tree, chances there are no leaves on it, and that’s exactly what we want.
But if you spot any dried-out buds or leftover leaf stubs, gently remove them to help the cutting save energy for rooting.
Slightly Scratch the Bottom to Encourage Rooting
Now, take a closer look at the bottom end of the cutting, the one with the slanted cut.
You can lightly scratch the bark on one side about an inch long.
This little wound encourages the cutting to form callus tissue, which helps new roots develop faster.
Use Rooting Hormone (Optional, But Helpful)
Next, dip the bottom 1–2 inches of the cutting into a rooting hormone.
It is totally optional in the process of propagating fig tree from cuttings, but it gives your cutting a nice boost, especially if you’re in a drier or cooler region.
If you prefer natural methods, a little cinnamon or honey can also support root growth.
Lastly, double-check that you’ve marked the cutting properly. A straight cut at the top and a slanted cut at the bottom is usually enough, but if you’re working with several cuttings, a tiny mark or label will save you second-guessing later.
Step 3: Prepare the Pot and Tuck in the Cutting
Now that your cutting is ready, it’s time to give it a cozy, well-prepared space to root in.
According to LazyDogFarm and GardeningKnowHow, using small cups or seedling pots about 6 inches deep and 2.5 inches wide works great, with just enough space for the cutting to grow strong roots without drowning in too much soil.
Start with a Mulch Layer
But here is a little trick before placing those cups: First, spread a thin layer of mulch (like dry leaves or fine bark) at the base of your main container or tray.
It helps with drainage and keeps the environment moist without letting the bottom of your cups sit in standing water, a common reason for rot.
Place pots on the Mulch layer
Now, place your seedling pots or plastic cups on top of the mulch layer, as many as the number of cuttings you have prepared.
Once they’re in place, fill them with a well-draining potting mix (you can use a blend like perlite + peat moss or coco coir + compost)
This mix is lighter and holds just enough moisture to support root growth, unlike regular garden soil, which can stay too compact or wet and may suffocate new roots.
Spray a Little Water and Make Holes
After filling the pots, spray a little water using a spray bottle, just enough to moisten the mix, not soak it. It gives the fig cutting a welcoming, damp space to begin rooting.
Now, take a pencil or a small stick (thicker than the cutting) and gently make a hole in the center of each cup. It prevents damage to the fig cutting when you insert it and makes space for the roots to grow freely.
Make the Cut, Add Hormone & Plant Your Cutting
Before inserting the cuttings, take each one and gently make a vertical cut about ½ inch long at the bottom end, right where it will sit in the soil.
This step encourages faster root formation, as the cut exposes more surface area for root cells to form.
Then, dip the base of each cutting into rooting hormone (if you’re using it), and carefully insert it into the hole you made, pressing the soil gently around it for support.
Step 4: Provide a Moist and Warm Environment
If you have just one tray, it helps to loosely cover it with a clear plastic lid or even a bag. It traps some moisture and keeps the air around your cuttings gentle and warm, like a mini greenhouse.
But if you are rooting a whole batch of fig cuttings or the weather already feels moist, you can often skip the cover, they will keep each other cozy.
Where to Place Planted Fig Cuttings?
Just watch out if you are placing them inside a greenhouse: a fig grower from LazyDogFarm mentioned how his cuttings crisped up and gave up thanks to trapped heat.
So be kind with the warmth, stick to a steady 65 to 75°F, and no harsh rays. Indoors near a bright window works great, as long as it’s not blasting direct sun.
How Often Water to Fig Cuttings?
When it comes to watering, your soil should feel just a little damp to the touch, not wet, not bone-dry. A light mist now and then is all they ask for.
And every few days, peek inside: if you spot fuzzy mold or blackened tips, it’s a sign to back off the water or lift the cover for a breather.
After a couple of weeks, give one cutting a soft tug; if it resists, that’s roots saying hello.
Step 5: Transplant After 6 to 8 Weeks
About 6 to 8 weeks after planting your fig cuttings, you’ll start to see signs of life, not just green, but strong, purposeful growth.
Look for a few healthy leaves, a bit of height, and even a slight stiffness in the stem. That’s your signal: the roots are doing their job underneath, and the plant is ready to move on.
Moving Rooted Cuttings Into Bigger Containers
If you started your cuttings in small seedling cups or plastic containers, now is the time to gently transplant them into a larger pot, something around 8 to 10 inches deep, depending on your fig variety.
Some types grow slower, others stretch fast, so if you see the roots poking out from the drainage holes or the top starting to crowd, take that as your cue.
It’s not always the same timeline for every variety, but this gentle observation works better than watching a calendar.
Skip Transplanting? Only If You Used a Large Pot
Now, if you have planted your fig cutting directly into a big pot, then relax, there’s no transplanting needed. The plant already has space to grow as long as drainage and soil quality are on point.
But if you use very small pots or seedling trays, transplanting becomes important. The roots don’t like to feel cramped, and once the plant is actively growing, it needs more room to spread.
The Safest Way to Shift Your Fig Cutting
The good news? If your cutting was in a cup or seedling cell, you can lift the whole soil block out, just like a firm cake, and drop it into the new pot without breaking the roots. That’s the safest way to shift without causing transplant shock.
Before You Take It Outside: Check the Temperature
Once potted into the bigger home, place your fig plant outdoors only when the nights are consistently warm, think about late spring to early summer, depending on your region. Until then, keep it somewhere bright, warm, and out of strong wind or scorching sun.
Enjoy 5 easy steps to propagate fig from cuttings. Cut, Root, Grow With GardenChains!