Garlic is an herb from the onion and leeks family. It has many health benefits and a cooking taste. As a beginner gardener, you might have questions like “How to Plant Garlic?” and “When to Grow Garlic?“
In this guide, we will teach the growing method step by step. Whether you are from any gardening zone, this content offers a general process that works for gardeners living in any region.
As a gardener, you need to know:
How environmental factors affect plant growth traits
Key takeaways: Garlic Requirements for Growing
- Temperature: Garlic prefers cool temperatures ranging from 50F to 75F to make the bulb. So, winter is beneficial for its optimal growth. I will describe the preferred temperature from the initial stage to bulb formation, so keep exploring!
- Planting Time: The fall season is the best period to plant garlic as it gives enough time to establish roots gently in the soil. However, we will learn about other seasons for garlic planting.
- Soil Type: Garlic requires soil that prevents rot and allows proper drainage. In my opinion, Loamy, well-drained, and slightly acidic soil (6.0 to 7.0) is ideal for garlic.
- Humidity: Too much moisture can lead to fungal infection of the garlic plant, while too much little causes poor bulb development. Keep a moderate humidity level of about 50 % to 70% for better garlic harvest.
- Spacing & Depth: While planting garlic cloves, remember to sow them 2 to 3 inches deep and space them about 4 to 6 inches apart. It allows for growing garlic bulbs properly without causing disturbances inside.
- Mulching: Add a layer of 2 to 3 inches around the garlic plant to retain moisture, suppress weeds, and protect it from cold climate (below 20F). Also, take care of termites’ preferences while mulching!
- Watering and Fertilizing: Garlic needs consistent but light watering, so avoid overwatering as it is prone to rot in soggy soil. The season also affects the watering schedule; discover winter gardening here!
- Harvesting Time: When you feel garlic leaves yellow and dry, it is time to harvest it. Typically, it is ready in mid to late summer, depending on the planting time and local climate.
- Post-Harvest Care: After harvesting garlic, keep it in a warm and dry place with good air circulation. Once cured, store it in a cool, dry, and dark place to maintain its freshness.
How much temperature does garlic Need to Grow
Garlic thrives in specific conditions for the growth cycle, from root development to bulb formation. Typically, garlic prefers cold temperatures but is slightly different for each step of growth, such as;
- For the initial stage, garlic prefers cool soil temperatures around 32°F to 50°F (0°C to 10°C) to establish roots.
- In the Cold Stratification Phase, garlic wants a temperature below 40°F (4°C) to divide cloves into multiple sections.
- For active growth in the spring, garlic needs a temperature of 50°F to 75°F (10°C to 24°C) to focus on photosynthesis.
- Garlic requires a temperature of around 70°F (21°C) for bulb formation in the late spring to early summer.
- For Maturity, garlic prefers dry, warm weather around 75°F (24°C) in the mid to late Summer to make better harvest.
By the way, generally, garlic wants 50 to 60F (10 to 15C) temperature
For a beautiful harvest, you need to walk according to your zone’s climate and the temperature that garlic prefers. But How? Let’s discover!
When to Plant Garlic? Review under Every Season
Garlic planting time depends on the weather and growing zone. First, you need to identify the climate where you live and then decide the best time to plant garlic. However, there are timing considerations for every season of the year.
Fall Planting (Preferred Time)
Typically, fall is the best time to plant garlic as it is exposed to garlic bulbs in cold periods. The fall season allows the garlic to establish roots before winter because the initial stage of garlic can’t handle winter, causing poor harvest.
- Timeframe: Plant garlic 4 to 6 days before the winter in your area.
- Zone: September to November is the best time for zones 3 to 8.
Winter (For Warmer Zones)
USDA zones 8 to 10 experience mild winters, giving the chance to plant garlic in winter. Although in freezing climates where the temperature drops below 20F, garlic planting is not suitable.
- Time frame: Plant garlic from December to January
- Zone: Suitable for zones 8 to 10 (where the temperature stays above 20F)
Spring (Alternative Option)
If the fall planting is missed, you can plant garlic in spring, but during this time, garlic makes small bulbs because it can’t get cold exposure, and you achieve small garlic compared to fall planting.
- Time frame: February to March when soil is workable
- Zone: Can work in all zones but effective for zones 3 to 6.
If you are from Alaska, here is the complete guide for growing garlic, especially for Alaska’s gardeners!
Summer (Not Recommended)
High temperatures can stunt garlic growth, giving too small garlic bulbs. But you can plant garlic in late summer as preparation for fall. It’s mean we circle back to where we started😅! Here’s what is considered early summer for gardening
- Timeframe: Late August for preparation before fall planting.
- Zones: Rarely used; experimental for warmer climates.
Consider the current season and decide garlic planting time!
How to Plant Garlic: Step-by-Step Guide
Have you decided on garlic planting time? If yes, let’s start to plant it by following the steps; Remember garlic requirements before starting!
Step 1: Choose the Right Garlic Varieties
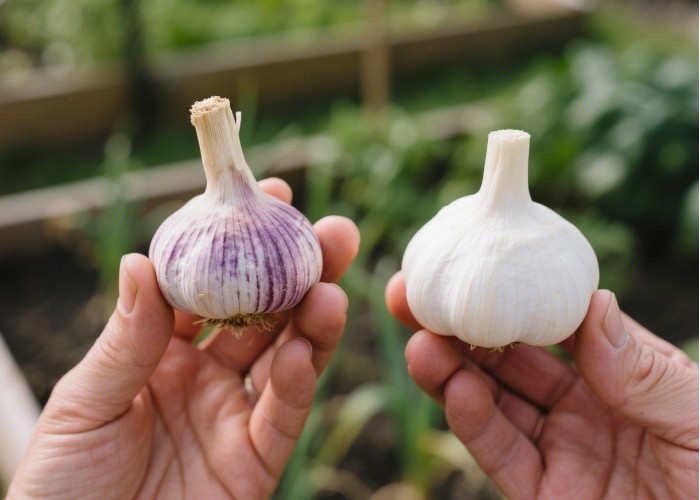
Garlic comes in two types; hard-neck and soft-neck. Hardneck grows best in cold climates while soft-neck thrive in warmer zones. Check the climate and choose a suitable variety.
Discover garlic varieties
Step 2: Prepare the Soil for Garlic
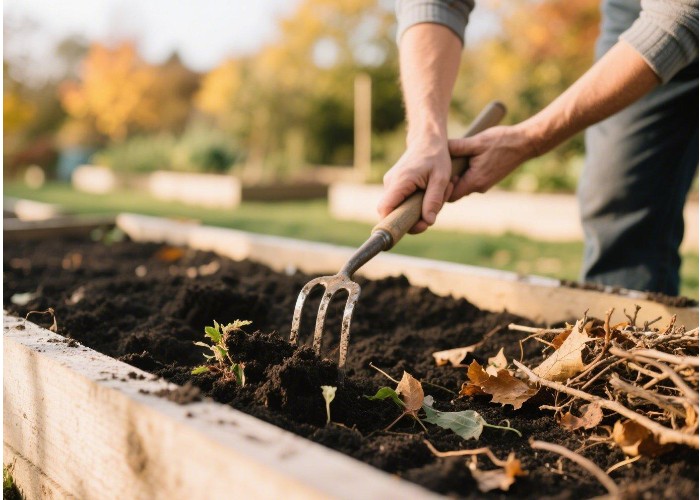
As I have already mentioned in takeaways, garlic prefers loamy, well-drained, and slightly acidic soil. Choose an area where sunlight can reach for 6 to 8 hours. Remove weeds and debris from the soil and clear the space. Garlic prefers loamy or sandy soil with 6.0 to 7.0 pH for both varieties. However, if;
- Hard-neck: Cool soil with plenty of organic matter
- Soft-neck: Dry and warm; well-draining soil
If the soil is acidic, mix calcium carbonate fertilizer with sustainable amounts according to soil acidity.
Step 3: Break the Garlic Bulbs into Cloves
Gently break the garlic bulb apart by hand, making sure to keep the individual cloves intact. Avoid peeling the cloves, as their skin provides protection and aids in the growth process. If any outer layer of a clove comes off, discard it.
Step 4: Dig Holes & Plant Garlic Cloves in the Soil
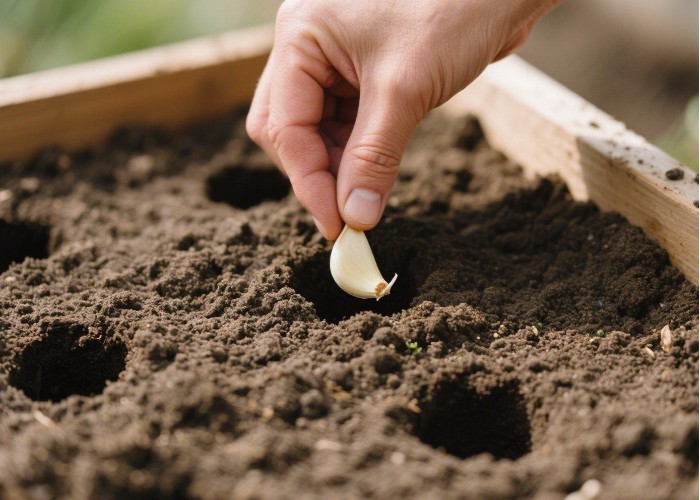
Make sure to plant it in the right position and space. Sow garlic cloves 2 to 3 inches deep by keeping them flat side down and pointed side up. Also, keep a space of 6 to 7 inches between multiple garlic cloves to ensure proper growth and harvest.
Extra Tips During Planting & Before Harvesting
⦿Choose Healthy Garlic Bulbs: Always select firm, healthy bulbs free from disease or damage. Weak bulbs lead to poor growth.
⦿Avoid Overcrowding: Leave enough space between cloves when planting to ensure they have room to grow and develop into large bulbs.
⦿Rotate Garlic Planting Locations: To prevent soil depletion and pest buildup, avoid planting garlic in the same spot every year. Rotate it with other crops.
⦿Provide Full Sun: Garlic thrives in full sunlight. Ensure the planting area receives at least 6 hours of direct sun per day.
⦿Improve Drainage: If your soil tends to be heavy or clayey, improve drainage by adding organic material like compost or sand to the soil.
⦿Be Mindful of Watering: Garlic prefers evenly moist soil, but be cautious not to overwater. Too much water can lead to root rot or fungal issues.
⦿Mulch Well in Cold Zones: Mulching is especially important in colder zones (3-7) to protect garlic from freezing temperatures during winter.
⦿Fertilize Moderately: Garlic doesn’t need a lot of fertilizer. Too much nitrogen can cause excessive leaf growth and fewer bulbs.
Harvesting Garlic At The Right Time
I am not telling you the exact time for harvesting. However, you should know garlic takes 7 to 8 months depending on the garlic variety and growing conditions. So, just keep in mind this period and look for some signs that indicate garlic is ready!
- Lower leaves turn yellow and dry out.
- Upper leaves remain green.
- Bulbs feel firm and have fully formed cloves.
- The outer skin of the bulb is papery and intact.
- The soil around the bulbs begins to loosen naturally.
According to the fall planting, garlic will be ready in late spring to mid-summer. And just like that timing may change according to the planting time.
How to Harvest Garlic: Step-by-Step
Step 1: Observe the Plant Closely
Check the leaves of the garlic plant. When about 3-4 lower leaves turn yellow and dry out, and the upper leaves are still green, your garlic is ready to harvest. This stage ensures the bulbs are mature but not overripe, which can cause the cloves to split.
Step 2: Prepare the Soil
A day before harvesting, water the soil lightly if it’s too dry. This softens the ground, making it easier to lift the bulbs without damaging them. Avoid overwatering, as soggy soil can make garlic dirty and harder to cure.
Step 3: Loosen the Soil Carefully
Using a garden fork or spade, insert it about 6-8 inches away from the plant to avoid piercing the bulb. Gently lift the soil around the bulb, loosening it evenly. This is especially important in clay or compacted soils where bulbs can be tightly gripped.
Step 4: Lift the Garlic Bulbs
Once the soil is loosened, grip the plant near its base and carefully pull it upward. If it resists, wiggle it gently while lifting it to avoid snapping the stem or damaging the bulb.
Step 5: Clean Off Excess Soil
Shake off loose soil from the bulb, but don’t wash it with water. Moisture at this stage can encourage mold or rot during the curing process. If there’s stubborn dirt, let it dry naturally and brush it off later.
Step 6: Inspect Each Bulb
Examine the bulbs for any damage or signs of disease like discoloration or soft spots. Set aside any damaged bulbs for immediate use and only cure healthy ones for storage.
Step 7: Cure the Garlic Properly
Lay the bulbs in a single layer in a dry, shaded, and well-ventilated space like a garage or shed. Ensure no bulbs are overlapping to allow even air circulation. Let them cure for about 2-3 weeks until the outer skins are completely dry and papery.
Step 8: Trim and Store Carefully
After curing, cut the stems down to about 1 inch above the bulb and trim the roots. Brush off any remaining soil gently with your hands. Store the garlic in a cool, dark, and dry place with good airflow, such as a mesh bag or hanging braids. Avoid storing in plastic bags, as this traps moisture and can lead to rot.
How to Store Garlic?
To store garlic properly, start by ensuring it has been cured for about 2-3 weeks in a dry, well-ventilated area, away from direct sunlight. After curing, trim the roots and cut the stems down to about 1 inch. Be sure to leave the skin intact on each bulb to help protect the cloves during storage.
Brush off any remaining soil gently, but avoid washing the garlic as moisture can cause spoilage. Store the garlic in a cool, dry place (around 60°F), with good airflow, like a mesh bag, a basket, or hanging braids. Keep it away from moisture, heat, and direct light. Stored properly, garlic can last up to 6 months or more.
Here’s Discover your USDA zone and check relevant articles according to your gardening zone.
When and How to Seed Lemongrass in Zone 9a for a Bountiful Harvest
8 Top & Fastest Fruits-Planting Fruit Trees in Zone 9a and Zone 9b
Final Thoughts: How to Grow Garlic
Growing garlic in your garden is not only simple but also incredibly rewarding. From planting the cloves in fall to harvesting them in summer, every step offers a chance to connect with nature. I’ve personally found that garlic thrives with minimal fuss, as long as you give it the right environment. The most satisfying moment? Pulling up those hearty bulbs and enjoying the fresh, bold flavor in your cooking. If you’re new to gardening, don’t worry—garlic is forgiving and grows well in many conditions. Stick with it, and you’ll be rewarded with a bountiful harvest!
FAQ’s
What is the proper way to plant garlic?
So, when planting garlic, you want to break apart the bulb into cloves but don’t peel them. Just keep that papery skin on—it helps protect the cloves. Find a nice sunny spot with well-drained soil. Plant the cloves about 2-3 inches deep, with the pointy end up, and give them enough space—around 4-6 inches apart. Garlic loves slightly acidic soil, so maybe test it out if you’re not sure.
Can I grow garlic from a clove?
Absolutely! Garlic grows best from individual cloves, not seeds. Just grab a healthy clove from your garlic bulb, and that’s all you need to grow a new garlic plant. Each clove holds everything it needs to sprout and turn into a full garlic bulb.
How long does it take to grow garlic?
Garlic takes a while—about 7-8 months. If you plant it in the fall, you’ll usually be harvesting it in late spring or early summer. It’s ready to go when the lower leaves start to yellow and dry up. Don’t rush garlic as it knows when it’s time!
Do you peel garlic before planting?
Nope, don’t peel it! Keep the skin on. That papery layer helps protect the garlic clove and keeps it safe from diseases. Just break the bulb into cloves, and plant them as they are—skin and all.
What not to do when planting garlic?
A couple of things to avoid: First, don’t plant cloves that are damaged or diseased. They won’t grow well, and they could spread issues to the rest of your garlic. Also, don’t crowd them—give each clove some space to grow properly. And make sure your soil drains well. Garlic hates being in waterlogged soil.
Why wait after cutting garlic?
When you harvest or cut your garlic, let it rest for a few days before you plant it again. This gives it time to dry out a bit, which helps avoid mold or rot. Plus, when you plant it after a little curing, the garlic has a better chance of developing strong roots.
Why do you soak garlic before planting?
Soaking garlic before planting helps keep it safe from diseases or pests that might be lurking on the surface. It also gives the cloves a little boost—kind of like a head start. The soaking helps with root development, so your garlic grows strong and healthy.
How to make garlic stronger?
If you want your garlic to grow strong, make sure you’re planting it in nutrient-rich, well-drained soil with lots of sunlight. Adding compost or some organic fertilizer can help too. Mulching around the plants will keep moisture in and reduce competition from weeds, so your garlic can thrive.
How to speed up garlic growth?
To give your garlic a speed boost, make sure it’s planted in good, fertile soil. Keep the soil moist (but not too wet), and make sure your garlic is getting enough sunlight. Fertilizing with compost or organic matter will also help. And don’t forget to pull out any weeds—you want your garlic to have all the space and nutrients it can get!
What is the best fertilizer for garlic?
For the best results, go for a balanced fertilizer like a 5-10-10 mix—this gives garlic the nitrogen, phosphorus, and potassium it needs. You can also use compost or bone meal to naturally feed your plants. Just make sure to apply the fertilizer in the spring and again in the middle of the growing season to keep your garlic strong.