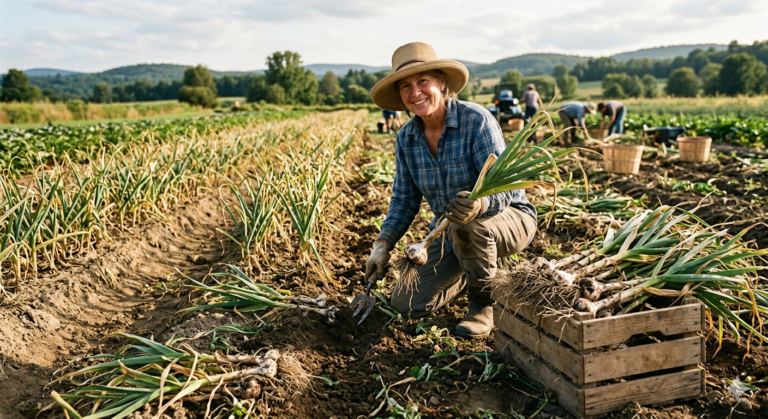
You’ve waited patiently for months, and when your garlic is finally ready, you move to harvest it quickly, Right?.
But here’s the tricky part now: actually getting those bulbs out of the ground without damaging them.
If you’re harvesting garlic for the first time, this moment can be nerve-wracking. One wrong move, pulling too hard, digging too close, or handling roughly, and you’ve ruined months of careful effort in seconds.
I’ve seen beginners lose half their harvest to bruised and broken cloves that rot within days. All that waiting, wasted.
The right way to harvest and store garlic is simple:
1) Loosen the soil with a fork a few inches away from the bulb.
2) Lift gently, brush off dirt without washing
3) Then cure in a shaded spot for two to three weeks before storing somewhere cool and dry.
Still, if you want to learn more deeply, read the full article so you can avoid all the mistakes that beggars often make.
How To Harvest Garlic Bulbs?
Harvesting garlic requires precision. One wrong move can damage bulbs you’ve nurtured for eight or nine months. The technique matters more than most gardeners realize.
Here’s the method that works for both hardneck and softneck varieties:
Check soil conditions first.
Harvest only when the ground is dry. Wet soil adheres to bulbs, creating conditions that favor mold growth during curing. If rain fell within the last 48 hours, wait.
Loosen before lifting.
Insert a garden fork or spade 4-6 inches away from the stem.
Push it straight down, then lever gently to break the soil’s hold on the bulb.
Never attempt to pull garlic directly from packed earth.
Lift from underneath.
Once the soil is loose, slide your tool beneath the bulb and raise it slowly. Then grip the stalk at its base and remove the entire plant. Pulling from the top of the stalk risks tearing the neck or leaving the bulb behind.
Handle with care.
Do not knock bulbs against each other or hard surfaces. Do not drop them. Any impact causes internal bruising that leads to decay during storage.
Keep the plant whole.
Roots, stalk, and leaves remain attached. Removing them now interrupts the curing process and reduces storage life.
Move to shade immediately.
Direct sunlight damages freshly harvested garlic within an hour. Transfer bulbs to a shaded, ventilated area without delay.
This method applies universally. However, hardneck and softneck garlic each require specific considerations during harvest. Those details follow below.
How To Harvest Hardneck Garlic Bulbs?
")
Hardneck garlic features a rigid central stalk that extends through the entire bulb. This structure demands specific attention.
1) Avoid twisting: Any rotational force on the stalk can split the bulb internally. Pull straight upward only.
2) Loosen a wider area: Hardneck bulbs typically grow deeper than softneck bulbs. Extend your loosening radius to prevent resistance that could damage the bulb during extraction.
3) Support elephant garlic: These oversized bulbs carry significant weight. Place one hand beneath the bulb while lifting to prevent the neck from snapping.
4) Inspect for bulbils: If you allowed scapes to mature, small bulbils may have dropped into the surrounding soil. Recover these for future planting.
5) Check wrapper integrity: Hardneck wrappers are generally sturdy, but cloves near the soil surface may have been exposed to moisture or pests. Examine each bulb and set aside any with compromised wrappers for immediate use rather than storage.
How To Harvest Softneck Garlic Bulbs?
")
Softneck garlic lacks the central stalk found in hardneck varieties. Its flexible neck and thinner wrappers require adjusted handling.
1) Grip at the base only:The pliable stalk tears easily. Always hold the plant where the neck meets the bulb, never higher.
2) Reduce digging depth: Softneck bulbs sit closer to the surface. Excessive depth with your fork risks puncturing the bulb from below.
3) Protect the wrappers: Softneck varieties have thinner, more delicate outer layers. Contact with rocks, tools, or rough handling removes these protective skins. Each lost layer shortens storage potential.
4) Preserve stalk length for braiding: If you plan to braid your garlic, maintain maximum stalk length and avoid any bending or crimping during harvest. Damaged stalks become unusable for braiding.
5) Prioritize these bulbs for long storage: Properly harvested softneck garlic stores 6-9 months. Damaged bulbs should be separated and used first.
How To Harvest Garlic Scapes?
")
Garlic scapes appear only on hardneck varieties. These curled flower stalks emerge in late spring, usually 4-6 weeks before bulb harvest.
Removing them redirects the plant’s energy toward bulb development. Left alone, the plant focuses on flowering instead of growing larger cloves.
1) Identify the right stage.
Scapes are ready when they have formed one or two complete loops. At this point, the stalk is tender and snaps cleanly.
Once the scape straightens and the tip begins to swell, the window has passed. Straight scapes turn woody and lose their culinary value.
2) Confirm tenderness.
Bend the scape gently between your fingers. If it feels flexible and breaks with a crisp snap, proceed with harvest.
If it bends without breaking or feels fibrous, you’ve waited too long. Use these overmature scapes for compost rather than cooking.
3) Locate the cutting point.
Follow the scape down to where it emerges from the topmost leaf. This junction is your target.
Cutting here removes the entire scape without damaging the leaves the plant still needs for photosynthesis.
4) Use a clean, sharp tool.
A knife, kitchen scissors, or garden snips work equally well. The blade must be sharp.
Dull tools crush the stem rather than cutting it, leaving an open wound susceptible to disease. A clean cut heals faster.
5) Cut at an angle.
Position your blade at a slight angle rather than straight across.
Angled cuts allow moisture to run off, reducing the risk of fungal infection entering the stem.
6) Remove the entire scape.
Do not leave a stub behind. Partial removal still allows the plant to direct energy toward the remaining portion. A complete cut ensures maximum benefit to bulb development.
7) Harvest in dry conditions.
Wet weather increases infection risk at the cut site. If morning dew is present, wait until foliage dries before harvesting scapes.
8) Handle gently after cutting.
Scapes bruise easily despite their firm appearance. Place them carefully in a basket or container. Avoid piling heavy objects on top.
9) Store properly if not using immediately.
Wrap scapes loosely in a damp paper towel and refrigerate. They remain fresh for 2-3 weeks when stored correctly. Alternatively, chop and freeze for longer preservation.
10) Monitor remaining plants.
After scape removal, the plant redirects energy to the bulb. You may notice accelerated leaf yellowing in the following weeks. This is normal and indicates approaching bulb maturity.
How To Harvest Garlic Bulbils?
")
Bulbils form only on hardneck garlic. When scapes are left unharvested, they eventually straighten and develop a capsule at the tip.
Inside this capsule, dozens of tiny bulbs develop, each one capable of growing into a full garlic plant over time.
Harvesting bulbils requires patience and precise timing. Collect them too early, and they won’t be viable. Wait too long, and you’ll lose them to the wind or soil.
1) Allow scapes to mature fully.
Do not harvest scapes from plants designated for bulbil production. Let the scape grow, straighten, and form a visible capsule at its tip. This process takes several weeks beyond the normal scape harvest time.
2) Monitor capsule development.
The capsule starts small and green. Over time, it swells, and the outer covering begins to dry. Watch for the first signs of splitting along the seams. This indicates the bulbils inside have matured.
3) Check bulbil readiness.
Gently press the capsule between your fingers. Mature bulbils feel firm and distinct, like tiny beads inside a pouch. If the contents feel soft or mushy, allow more time.
4)Harvest before the capsule bursts.
Once splitting begins, you have a narrow window. A fully burst capsule scatters bulbils across your garden bed, making collection difficult.
Cut the scape when the capsule shows cracks but remains mostly intact.
5) Cut below the capsule.
Use sharp scissors or garden snips. Cut the scape 6-8 inches below the capsule. This length makes handling easier and provides a natural holder during drying.
6) Harvest in dry weather.
Moisture compromises bulbil storage. Choose a day without rain or heavy dew. If conditions have been wet, wait for a dry period before harvesting.
7) Place capsules in a ventilated container.
Paper bags or mesh baskets work well. Avoid plastic bags or sealed containers; trapped moisture causes mold. The capsules need airflow to continue drying.
8) Allow complete drying.
Store capsules in a warm, dry location with good air circulation for 2-3 weeks. The outer covering will become papery, and the bulbils will harden further.
9) Extract bulbils carefully.
Once fully dry, crack open the capsule over a clean surface. The bulbils will fall free. Remove any remaining plant debris or papery fragments.
10) Sort by size.
Larger bulbils produce bigger plants in the first growing season. Separate them into size categories.
Prioritize larger bulbils for planting; smaller ones can be used for dense cover planting or discarded.
11) Store until planting time.
Place dried bulbils in paper envelopes or small cloth bags. Label with the variety and harvest date. Store in a cool, dry location until the fall planting season.
Important consideration: Bulbils require 2-3 years of consecutive planting to produce full-sized garlic bulbs. The first year yields small rounds. The second year produces larger rounds or small segmented bulbs. By the third year, mature bulbs develop. This method requires patience but offers a cost-effective way to multiply your garlic stock significantly.
How Long Does It Take To Harvest Garlic?
The actual harvesting process doesn’t take long at all, maybe 30 minutes for a small backyard patch. But growing garlic from planting to harvest? That’s where patience comes in.
Softneck Garlic
Softneck varieties are the early risers. From fall planting, expect 8-9 months until harvest. Most softneck garlic matures by late May or June, depending on your climate.
Spring-planted softneck moves quicker at around 4-5 months, though bulbs won’t reach their full potential size.
Hardneck Garlic
Hardneck takes its time. Same 8-9 months from fall planting, but harvest typically falls between late June and early August, a few weeks behind softneck.
Elephant garlic follows a similar schedule, sometimes needing an extra week or two, given its larger size.
Garlic Scapes
Garlic scapes are your first harvest of the season. They appear 4-6 weeks before bulbs mature.
The actual snipping takes just minutes, a quick walk through your garlic bed with scissors, and you’re done.
Garlic Bulbils
Bulbils arrive last, roughly around the same time as bulb harvest or slightly after. You’re waiting for the capsule to crack open, so timing depends on observation rather than a calendar.
How To Clean Garlic After Harvest?
")
Right after you pull garlic from the ground, resist the urge to make it look perfect. Cleaning at this stage is minimal, just enough to get rid of dirt without messing with those protective wrappers.
Give each bulb a shake. That’s usually enough to knock off most soil. If some dirt is really stuck on there, use your hands or a soft brush to gently work it loose. Whatever you do, don’t run water over your garlic. Wet bulbs and storage don’t go together.
While you’re at it, take a good look at each bulb. Any cuts from your shovel? Wrappers torn off during pulling? Set those aside, they’re destined for your kitchen this week, not your storage shelf.
Keep the roots and stalks attached. I know it looks messy, but they serve a purpose during curing. You’ll trim everything later.
And if something smells off or looks diseased, soft spots, or weird colors, get it away from the rest immediately. Problems spread fast when bulbs are curing together.
How To Cure Garlic After Harvest?
")
Here’s the truth about garlic: fresh from the ground, it won’t last long. Curing is what makes the difference between garlic that rots in three weeks and garlic that sits happily in your pantry until February.
Find a spot that’s warm, dry, and has decent airflow. A covered porch works. So does a garage or shed with the door cracked open.
Just keep bulbs out of direct sun, it fades the wrappers and can actually cook your garlic on hot days.
You can hang your garlic in bundles of 8-10 plants tied together, or spread bulbs out on a screen or rack. Either way, make sure air reaches every bulb. Piling them up defeats the purpose.
How long does this take? Anywhere from two to four weeks. Softneck finishes faster. Hardneck and elephant garlic need more time.
You’ll know it’s done when the wrappers feel like paper, the stalks snap instead of bend, and the roots crumble when you touch them.
Once everything is dry, you can finally clean things up. Trim roots short. Cut stalks to about an inch, unless you’re planning to braid softneck, then leave them long.
Peel off the dirtiest outer wrappers, but stop when you hit clean ones. Those layers are protecting your garlic.
How To Dry Garlic After Harvesting?
")
Drying and curing overlap a lot, but sometimes garlic needs extra help before proper curing can begin.
Pulled your garlic after rain? The outer layers might be damp. Spread those bulbs out on newspaper or cardboard in a room with a fan. Give them a day or two just to lose that surface moisture. Then move them to your regular curing spot.
Living somewhere humid? Curing takes longer and mold becomes a real concern. A dehumidifier in your curing space helps. Check bulbs every few days for any fuzzy white or green spots. Catch mold early and you can usually just remove the affected bulb before it spreads.
If things aren’t drying fast enough, add more airflow, not more heat. Point a fan at your garlic. High heat damages bulbs, but moving air speeds up drying without any risk.
The neck tells you everything. That’s the part where stalk meets bulb, and it’s always the last to dry. Squeeze it gently. Still soft? Keep drying. Hard and completely dry? You’re ready to move on.
How To Store Garlic After Harvesting?
")
You’ve grown it, harvested it, cured it, now don’t blow it at storage.
Softneck garlic can last 6-9 months when stored right. Hardneck gives you 3-5 months, sometimes less. The difference comes down to how you keep it.
Cool is good. Think 60-65°F. A basement, cellar, or the back of a pantry usually works. Skip the refrigerator, too cold and too humid. Garlic thinks it’s time to grow again and starts sprouting.
Airflow still matters. Mesh bags, wire baskets, paper bags with holes punched in them, braided strands hanging from a hook, all good options. Plastic bags or sealed containers trap moisture and speed up spoilage.
Darkness helps too. Light triggers sprouting and makes cloves taste bitter. Inside a cupboard beats sitting on the counter next to a window.
Check on your stash once a month. Squeeze bulbs gently. Anything soft, sprouting, or showing mold gets removed right away. One bad bulb affects the ones touching it.
Want to keep garlic even longer? You have options:
1) Freeze it. Peel the cloves first. Freeze them whole, or chop and freeze in ice cube trays covered with olive oil.
2) Dehydrate it. Slice cloves thin, dry them until crispy, then store in jars or grind into powder.
3) Pickle it. Drop peeled cloves into vinegar and refrigerate. They’ll last months and taste great.
Fresh storage works for everyday cooking. But if you’ve grown more than you can use in six months, preserving some means you’ll still be eating your own garlic next summer.
Garlic Planting Time is Different in Different Areas, That’s why GardenChains Has Created Detailed Research Based Guides.
When to plant garlic in Alaska?
When to plant garlic in Texas? Plant garlic in spring in Texas!!
When to plant garlic in Florida?