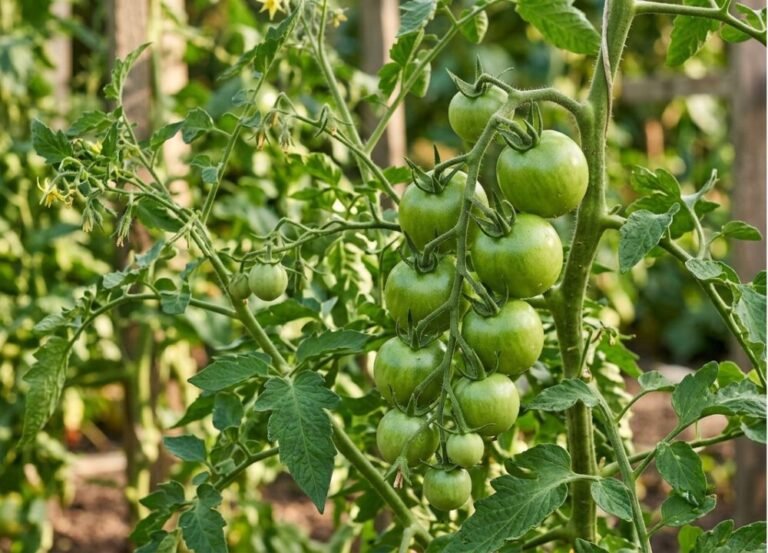
Frost warnings always arrive faster than tomato plants can finish their job.
Every fall, gardeners stare down a vine loaded with fruit that never got the chance to turn red.
The real question isn’t whether you can save these tomatoes. It’s whether each one is even ready to be saved.
Not every green tomato behaves the same way once it leaves the vine.
Some will slowly turn red on a kitchen shelf over the coming weeks. Others will simply sit there, green and stubborn, no matter how long you wait.
The difference comes down to one thing: how far along that tomato was before the cold hit.
Get that part wrong, and you’ll end up with a box of soft, rotting fruit by December. Get it right, and you could be slicing homegrown tomatoes well into the new year.
By the time frost is close, the plant itself is usually done. A tomato is a warm-weather plant, and a tomato plant will not survive winter outdoors once temperatures drop hard, so the fruit is often the only harvest left to protect.
How to Store Green Tomatoes for Winter?
Storing green tomatoes successfully rests on three basics: temperature, spacing, and regular checks.
Most gardeners store tomatoes too warm, which pushes them toward mold, or too cold, which stops the ripening process cold in its tracks.
A steady spot between 55 and 65 degrees Fahrenheit gives fruit enough warmth to slowly ripen without inviting decay.
Spacing matters just as much as temperature does. Tomatoes packed tightly together trap moisture and pass rot from one fruit to the next within days.
Moisture is the quiet enemy in storage, exactly as it is on a living plant. Too much water rots roots, and too much humidity rots stored fruit, which is why the same balance behind how often you water tomato plants applies in the storage box: enough to prevent shriveling, never enough to stay damp.
A few core rules apply no matter which stage your tomatoes are at:
- Keep them in a single layer, never stacked more than two deep.
- Store in a dark or dim spot, since light speeds up softening.
- Check the whole batch once a week for soft spots or mold.
- Pull out any damaged fruit the moment you spot it.
- Keep humidity moderate, since damp cardboard or wet newspaper invites fungus.
These rules work as a foundation, but the exact method still depends on how mature each tomato was at harvest.
Storing Mature Green Tomatoes
A mature green tomato has already reached full size and stopped growing, even though the skin hasn’t changed color yet.
Look closely at the surface. A faint whitish sheen, or the smallest hint of a pale yellow blush near the blossom end, usually signals maturity.
Full size is the clearest clue, and it is easier to judge once you recognize the final dimensions a fruit reaches across the stages of a tomato plant and its fruit. A mature green tomato reads as fully grown, just uncolored.
If you slice one open, mature seeds will resist being cut, since the gel around them has already fully formed.
This stage matters because mature green tomatoes still carry enough stored sugar and internal ripening triggers to finish the job off the vine.
According to Purdue University’s consumer horticulture program, mature green tomatoes will keep for three to five weeks when wrapped individually in newspaper and stored between 55 and 65 degrees. Weekly checks catch any fruit turning soft before it spreads.
Wrapping each tomato on its own does more than protect the skin from bruising.
It also traps a small pocket of ethylene gas around the fruit, which is the natural compound tomatoes release as they ripen.
For faster results, raise the storage temperature to somewhere between 65 and 70 degrees. Fruit stored at that range colors up noticeably quicker than fruit left in a cooler spot.
Boxes work just as well as individual wrapping, provided you keep tomatoes in a single layer and separate them with sheets of newspaper between rows.
Storing Immature Green Tomatoes
Immature green tomatoes are smaller, often still growing, and show none of the surface changes that mark maturity.
Cut one open and the difference becomes obvious. The seeds inside will still be soft enough to slice through cleanly, unlike the firmer seeds of a mature fruit.
This distinction matters because immature tomatoes simply lack the internal chemistry needed to finish ripening once picked.
They haven’t built up enough natural sugars or triggered the hormonal shift that pushes a tomato from green to red.
Timing is usually why late fruit ends up immature. A plant slows down as the weather cools, and tomato plants do not keep setting ripe fruit all summer, so the last flush often gets caught only half-developed.
Storing them the same way you’d store mature green tomatoes usually ends in disappointment.
Most will stay green for weeks, then eventually soften and spoil without ever developing color or full flavor.
Rather than treating these as a ripening project, plan on using them while they’re still firm and green.
Fried green tomato dishes, chutneys, relishes, and pickled preparations all rely on the tomato’s firm texture and tart taste, so immature fruit fits them perfectly.
If you’re unsure which category a tomato falls into, treat borderline fruit as immature. It costs you nothing to eat it green, but a failed ripening attempt costs you weeks of shelf space.
Preparing Green Tomatoes Before Storage
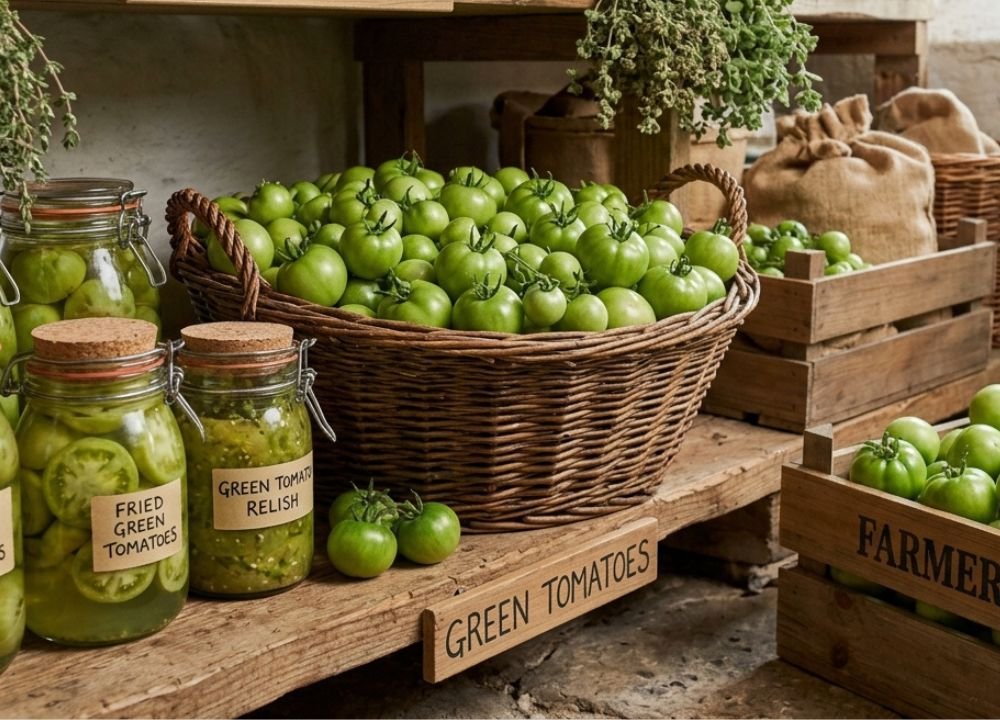
Preparation starts in the garden, not on the kitchen counter.
Harvest every usable green tomato roughly one to two weeks before your area’s average first frost date, rather than waiting until the last possible night.
A hard frost damages plant tissue and fruit alike, so pulling tomatoes early protects far more of your harvest than a last-minute scramble does.
Saving the fruit and saving the plant are two separate projects on two different clocks. If you would rather keep the plant alive than start over in spring, overwintering the tomato plant has to begin before the first hard frost, well ahead of the fruit-storage window.
Once you’ve picked everything worth saving, the next task is sorting rather than storing.
Set aside fruit with cracks, insect holes, or soft patches, since these tomatoes rarely make it through even a week of storage.
Wipe each tomato with a dry cloth to remove garden soil, but skip washing them with water unless they’re visibly caked in dirt.
Sorting by size and maturity stage now saves confusion later:
- Group tomatoes by mature green versus immature green stage.
- Separate any fruit with visible cuts, bruises, or soft spots.
- Set aside oversized or undersized fruit for immediate use instead.
- Wipe off loose soil rather than rinsing with water.
Clearing a whole bed at once usually means pruning and harvesting in the same session. Cutting the plants back for winter is the trimming half of that job, and it pairs naturally with this late-season harvest.
Ripening Green Tomatoes Indoors
Ripening mature green tomatoes indoors works best in a spot that stays warm, dim, and reasonably still.
A kitchen counter away from direct sun, or a covered box in a closet, both suit this purpose better than a sunny windowsill.
Direct sunlight doesn’t speed up ripening the way most people assume. It actually softens the skin unevenly and can scald the fruit before the inside ever turns red.
This is a different job from raising a plant. Where growing tomatoes indoors in winter means keeping a live plant productive under lights, indoor ripening is only about finishing fruit that has already formed.
Somewhere between 65 and 70 degrees Fahrenheit tends to produce the fastest, most even color change.
Watch for a gradual shift starting near the blossom end, where a faint yellow tint appears first before spreading across the rest of the fruit.
Over the following days, that yellow deepens into orange, then finally into a full red as the tomato softens slightly to the touch.
Placing a ripe apple or banana nearby can nudge things along, since both fruits release extra ethylene gas into the surrounding air.
Most mature green tomatoes finish ripening somewhere between one and three weeks, though size and initial maturity both shift that window.
Checking and Maintaining Stored Tomatoes Through Winter
Weekly inspection keeps a small storage problem from becoming a total loss.
Set a fixed day each week to go through your stored tomatoes, unwrapping a few at random even if nothing looks obviously wrong.
Soft spots, a sour smell, or visible white or grey fuzz are all signs a tomato needs to come out immediately.
Reading stored fruit is the same skill as reading a living one. The discoloration and soft, sunken patches that warn you here are close cousins of the symptoms that separate an overwatered tomato plant from an underwatered one, and both reward a slow, careful look.
One spoiling tomato can spread mold spores to neighboring fruit within just a few days, especially in a crowded box.
Rotation matters just as much as removal does.
Move ripening tomatoes toward the front of your storage spot so you use them while they’re at their best, rather than forgetting about them until they overripen.
Keep a rough mental count of how many tomatoes remain in each maturity group.
This makes it easier to notice when a batch is ripening faster or slower than expected, which often signals a temperature swing in your storage spot.
A few habits keep the whole stash on track through the colder months:
- Inspect every box or wrapped tomato once a week without skipping.
- Remove any fruit showing softness, mold, or a sour odor.
- Rotate ripening tomatoes forward so none get forgotten.
- Adjust storage temperature if ripening seems unusually fast or slow.
Getting the Most Out of Your Winter Green Tomato Stash
Every part of this process circles back to one judgment call: knowing which stage your tomatoes were at when you picked them.
Mature green fruit rewards patience, slowly turning into something close to a fresh, vine-ripened tomato over several weeks.
Immature green fruit rewards a different kind of planning, since it’s better used firm and green than left waiting for a ripening that won’t come.
Get the identification right at harvest, and the rest of the storage process becomes far more predictable.
Temperature, spacing, and weekly checks matter for both groups, but the outcome you can expect from each one is never the same.
Next year the fix starts even earlier. An earlier start lets more fruit ripen on the vine before frost, so getting the timing of your tomato seeds right leaves far fewer tomatoes caught green when the cold arrives.
Treat your green tomato harvest as two separate projects rather than one, and winter stops being the end of tomato season altogether.